Advanced Amazon PPC Campaigns Setup 2026 | Step By Step Tutorial for Beginners
PPC is hands down the most frustrating part of selling on Amazon.
It’s also the fastest way to drain your wallet if you don’t know exactly what you’re doing — and I see beginners make the same mistakes over and over again.

They jump into PPC unprepared.
They set things up incorrectly.
Then they wonder why they’re spending money with nothing to show for it.
The truth?
Amazon PPC only works when you have a strategy in place from day one.
In this guide, I’m going to walk you through my easy-to-set-up, beginner-friendly PPC strategy — the exact structure I use — so you can get your first campaigns live in minutes, even if you’ve never touched PPC before.
But first, you need to understand why PPC matters so much.
Why Amazon PPC Is Non-Negotiable in 2026
Over 70% of all Amazon sales happen on page one.
When you launch a new product, your listing is buried.
Why?
Because Amazon ranks products primarily based on sales velocity.
- More daily sales → Higher ranking
- Higher ranking → More visibility
- More visibility → More sales
Your new product has zero sales… so organically, it doesn’t stand a chance.
But look at the top of the search results.
See the word “Sponsored”?
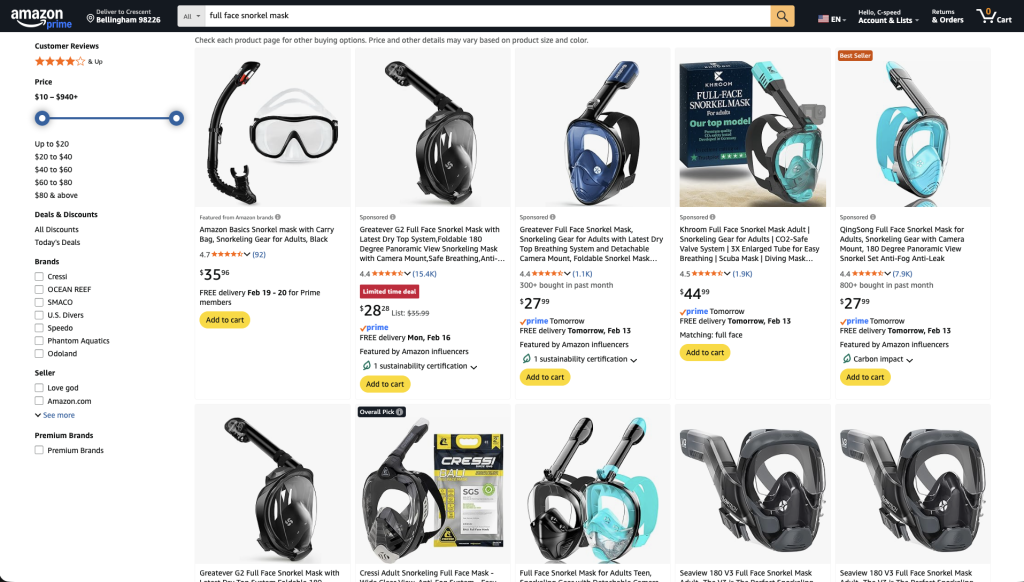
Those listings didn’t rank there.
They paid to be there.
That’s Amazon PPC.
And here’s where it gets powerful:
When you use PPC correctly, you can show up at the top of page one immediately — while generating the sales Amazon needs to rank you organically.
That’s how you shortcut the system.
When Should You Start PPC?
Immediately.
The moment your product goes live and inventory is in stock.
Amazon gives new listings a short “honeymoon period” where it temporarily boosts visibility. If you delay PPC during that time, you’re wasting it.
So make sure before launch:
- Photos are complete
- Listing copy is optimized
- Inventory is in stock
- Pricing is competitive
Then turn PPC on day one.
My 4-Step Amazon PPC Strategy
Here’s how we’re going to structure this:
- Automatic Campaigns (Data Collection Mode)
- Keyword Research
- Manual Keyword Campaigns (Profit Mode)
- Negative Keywords (Cost Control Mode)
This is a clean, repeatable system.
Step 1 – Setting Up Automatic Campaigns (The Right Way)
Go to:
Seller Central → Advertising → Campaign Manager → Sponsored Products
We’re focusing only on Sponsored Products for now.

| Campaign Type | Purpose | Beginner Friendly? |
|---|---|---|
| Sponsored Products | Search result ads | ✅ Yes |
| Sponsored Brands | Banner ads | ❌ Advanced |
| Sponsored Display | Product page ads | ❌ Advanced |
Click Create Campaign.
Naming Structure (Critical)
Do NOT use generic names.
Use this format:
Product Name – Target Type – Match TypeExample:
Tent Stakes – Automatic – Close MatchClean naming = clean data = easy optimization later.
Automatic Targeting Setup
Choose Automatic Targeting
Amazon breaks this into 4 groups:
| Target Type | What It Does |
|---|---|
| Close Match | Very similar searches |
| Loose Match | Broader related searches |
| Substitutes | Competitor product pages |
| Complements | Related product pages |
Beginner Mistake:
Running all 4 in one campaign.
Pro Move:
Create 4 separate campaigns — one for each targeting type.
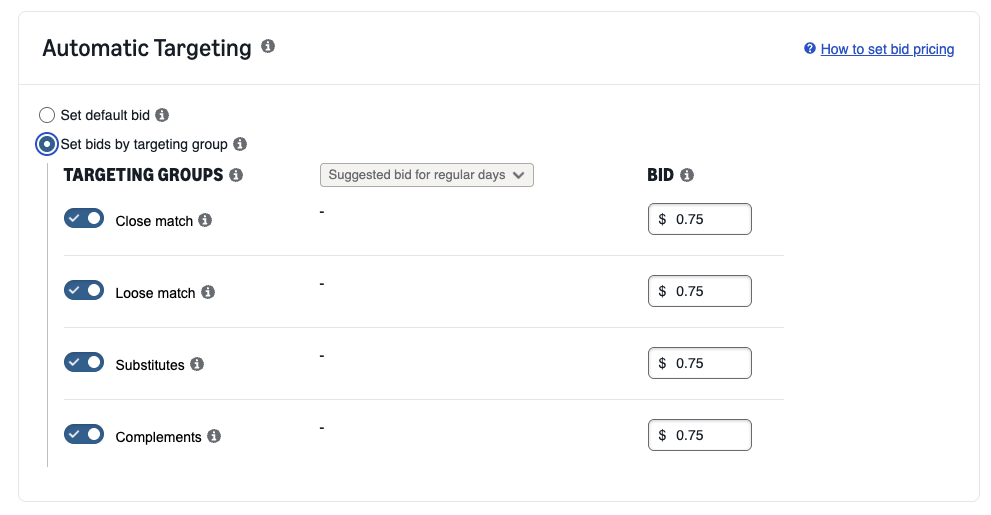
Start with:
Close Match onlyTurn off:
- Loose
- Substitutes
- Complements
We separate them because:
Mixing strategies inside one campaign makes optimization impossible.
Bidding Strategy
Choose:
Dynamic Bids – Up and Down
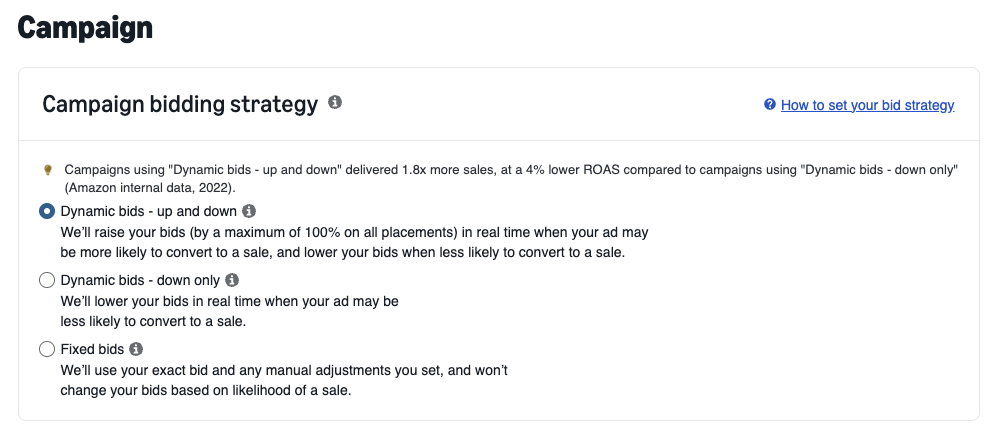
Why?
Amazon increases bids when it believes a shopper will convert.
This is powerful during launch.
Placement Adjustment
Increase:
Top of Search = 20–30%
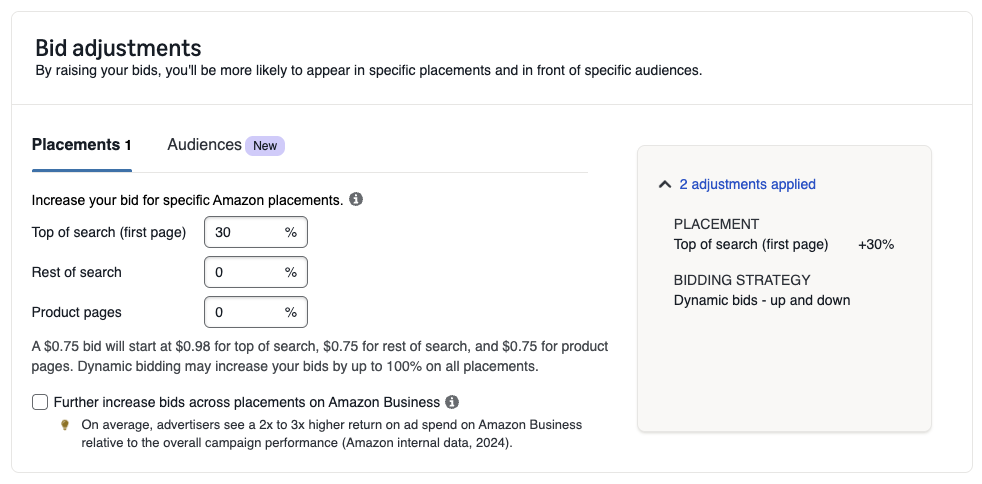
Leave:
- Rest of Search = 0
- Product Pages = 0
Top of search converts the best.
Budget
Launch Phase Recommendation:
| Campaign Type | Daily Budget |
|---|---|
| Automatic – Close | $20–$50 |
After launching Close Match, repeat this entire process for:
- Loose Match
- Substitutes
- Complements
You now have 4 clean automatic campaigns.
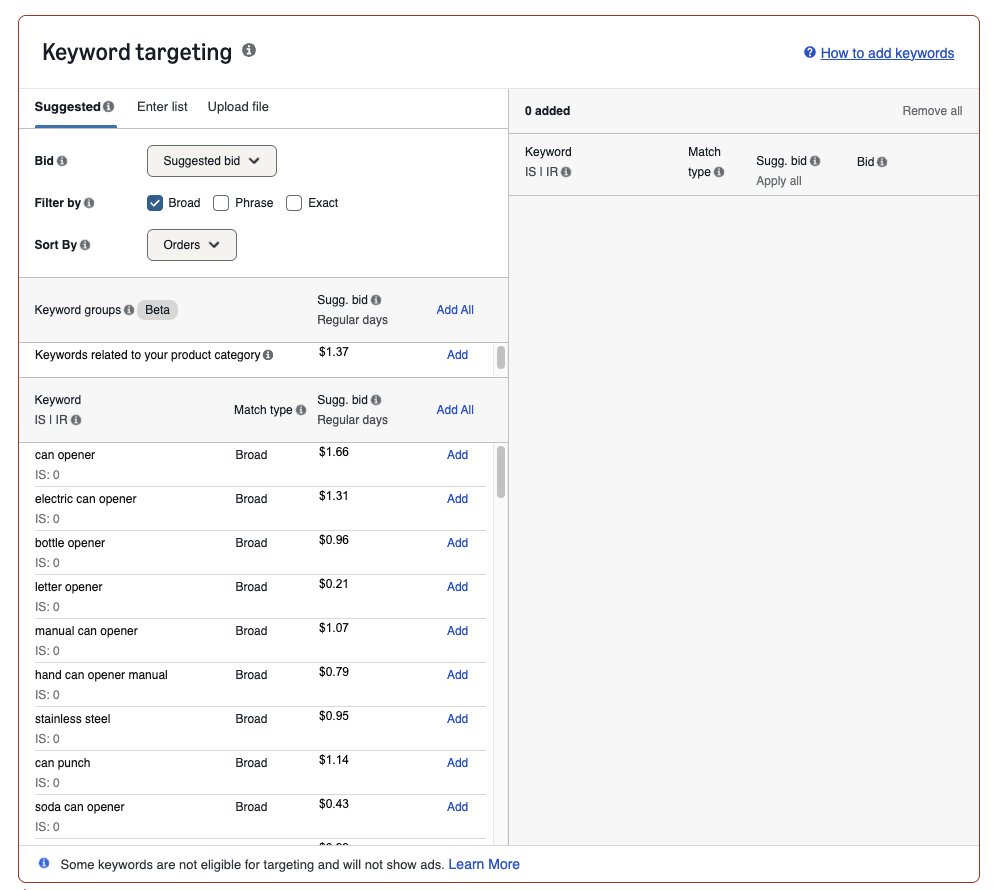
Step 2 – Keyword Research (The Real Power Move)
Amazon is a search engine.
Shoppers type specific phrases when they’re ready to buy.
Our job is to find those phrases.
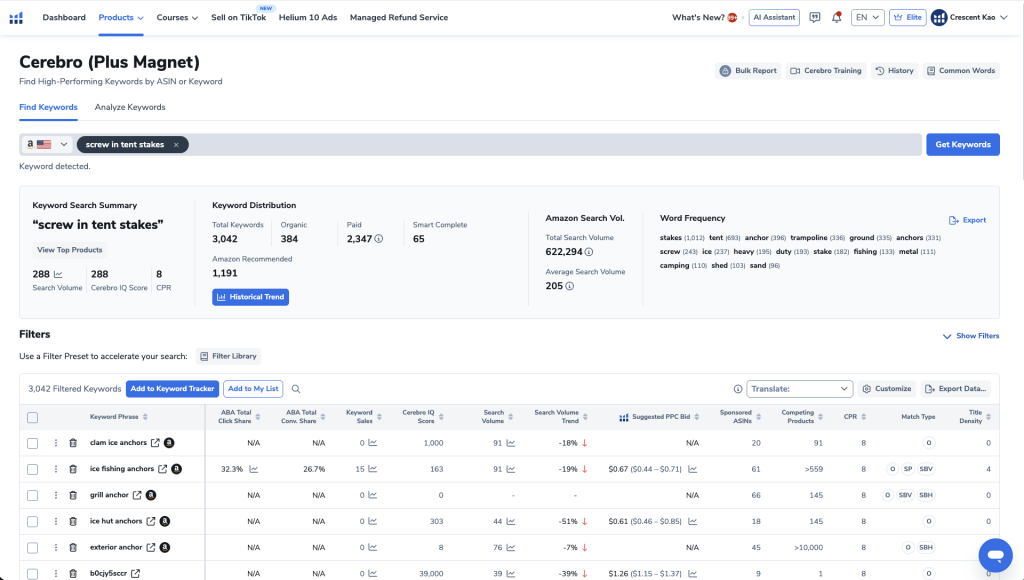
I use Helium 10 Cerebro for this. (Click Here for 35% Off Discount off Helium 10)
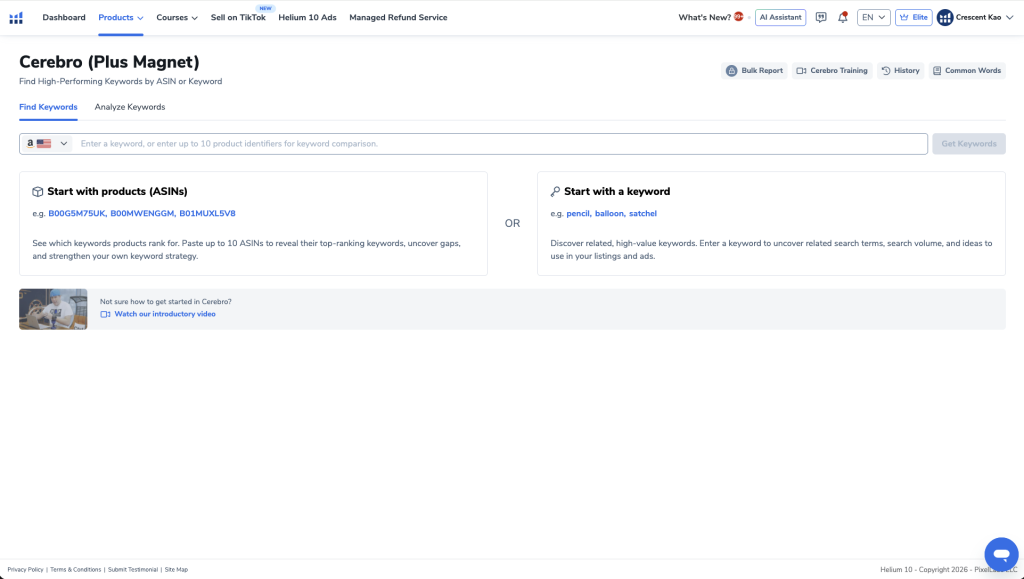
Enter your main keyword (example: screw in tent stakes).
Cerebro pulls thousands of related keywords.
You can learn more about Helium 10 and their other tools I recommend here.
Narrow It Down
Use filters:
- Match Type → Organic
- Remove irrelevant phrases
You’ll organize these into four keyword lists:
| List Type | Purpose |
|---|---|
| Main Keywords | High-intent core terms |
| Relevant Keywords | Strong supporting terms |
| Master List | Larger long-tail pool |
| Misspelled Keywords | Cheap overlooked traffic |
Clean organization is everything.
Understanding Match Types (Keep It Simple)
| Match Type | What It Does | Use It? |
|---|---|---|
| Exact | Must match exactly | ✅ Yes |
| Broad | Variations allowed | ✅ Yes |
| Phrase | Middle ground | ❌ Skip |
Why skip Phrase?
Because Broad already captures phrase-level traffic.
Adding Phrase just complicates optimization.
We keep things simple:
Exact + Broad only.
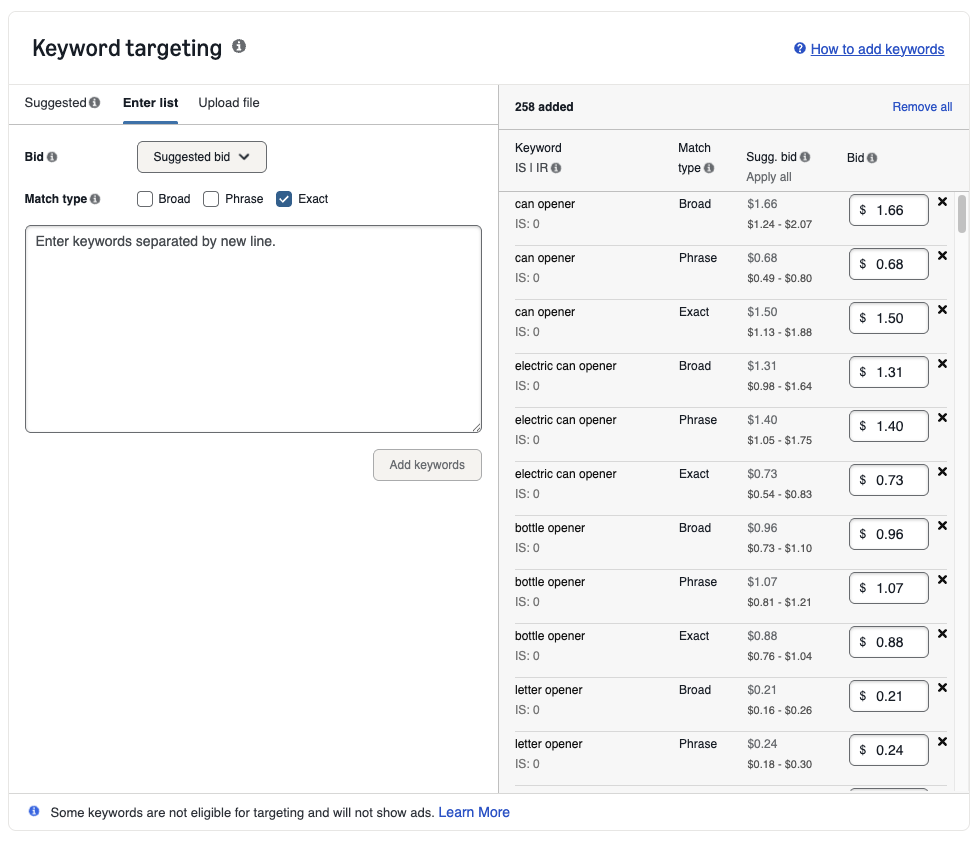
Step 3 – Manual Campaign Structure (Advanced Strategy)
Now we build 5 manual campaigns.
Campaign 1 – Main Keywords – Exact Match
Name:
Tent Stakes – Main – ExactTargeting:
- Manual
- Keyword targeting
- Exact only
Paste main keyword list.
Aggressive Bidding Strategy
Overbid suggested high bid by $1.
Yes — aggressively.
Why?
- Highest bidder gets best placement
- You only pay when clicked
- You only pay slightly above second highest bidder
If suggested bid range is:
$1.20 – $1.60
Bid:
$2.61
Use odd cents to outbid competitors.
Daily Budget Trick (Most Sellers Don’t Know This)
Set:
Daily Budget = $100
Even if you only want to spend $20.
Why?
Amazon paces impressions based on budget size.
Higher budget = more exposure
You only pay when clicked.
Once spend hits your comfort level:
Pause campaign for the day.
This maximizes visibility without overspending.
Campaign 2 – Relevant Keywords – Exact
Same setup as above.
Daily Budget: $100
Campaign 3 – Master List – Broad
Name:
Tent Stakes – Master – BroadDaily Budget: $20
Campaign 4 – Misspelled – Broad
Name:
Tent Stakes – Misspelled – BroadDaily Budget: $10
Campaign 5 – Amazon Suggested – Broad
Use Amazon’s suggested keywords.
Name:
Tent Stakes – Suggested – BroadDaily Budget: $10
Your Final Campaign Structure
| Type | Campaign Count |
|---|---|
| Automatic (4 types) | 4 |
| Manual Exact | 2 |
| Manual Broad | 3 |
| Total | 9 Campaigns |
Clean. Organized. Strategic.
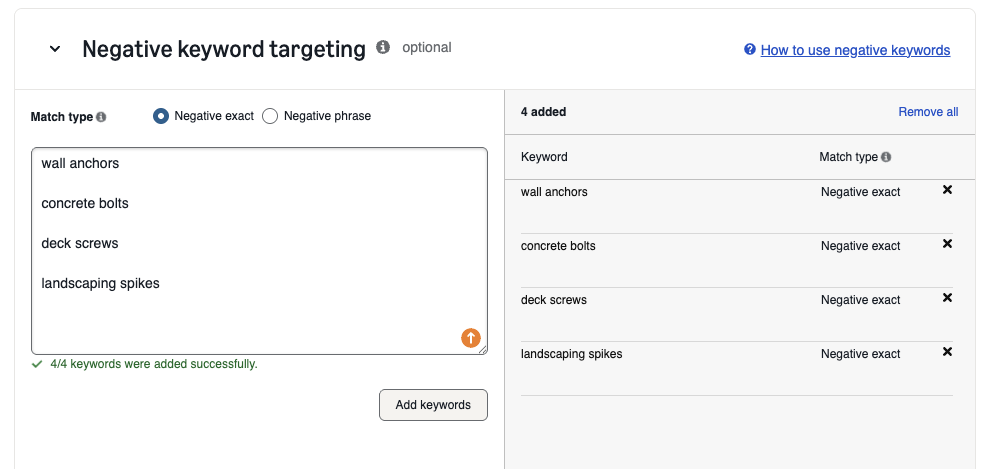
Step 4 – Negative Keywords (Save Thousands)
Negative keywords tell Amazon:
“Do NOT show my ad for this.”
Example if selling camping tent stakes:
Add as negatives:
- wall anchors
- concrete bolts
- deck screws
- landscaping spikes
Anything irrelevant = add to negative list.
Ongoing Negative Optimization
After 7–10 days:
- Download search term report
- Identify:
- High spend
- Zero sales
- Add those as negatives
This alone can save hundreds to thousands in wasted ad spend.
What Happens Next?
Let campaigns run 7–10 days minimum.
Do NOT:
- Make daily changes
- Panic optimize
- Adjust based on one bad day
You need data.
Clean structure → Clean data → Smart decisions.
PPC Optimization Philosophy
PPC success comes from:
- Separating strategies
- Collecting clean data
- Scaling winners
- Cutting losers
- Adding negatives consistently
Most sellers fail because they mix everything together.
Final Thoughts
Amazon PPC is not gambling.
It’s structured testing.
When done correctly:
- You get page one visibility instantly
- You generate launch sales
- You build organic rank faster
- You create predictable traffic
If you felt overwhelmed before, you shouldn’t anymore.
You now have:
- The exact campaign structure
- The bid strategy
- The budgeting strategy
- The negative keyword system
- The optimization timeline
Now let the campaigns run.
And remember:
The real money is made in optimization — but that only works if your foundation is built correctly.
Build it right from day one, and PPC becomes an asset instead of a liability.