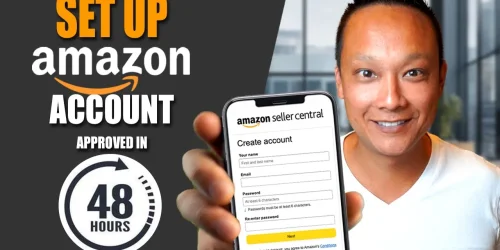
COMPLETE Amazon FBA Tutorial for 2023 | How to Sell on Amazon FBA and Make Money | Step by Step
What’s up guys, my name is Crescent. If you’re planning on starting your Amazon journey and want to build a successful Amazon business, you’ve come to the right place. I’m going to show you the exact step by step process of how you can start selling on Amazon from how to setup your Amazon seller account, finding the right products to sell, where to source them from, the best way to differentiate them, shipping them to Amazon, to launching your very first product. The entire process in itself isn’t hard at all, in fact pretty much anyone can sell on Amazon, however in order to be successful, there’s specific steps and strategies that you need to follow so that you can avoid some of the big mistakes and pitfalls beginners often make that can be detrimental to your success. Remember, you don’t know what you don’t know and that’s exactly what I’m going to cover in this video. So, sit down, relax, grab something to drink… as this is going to be the most complete and comprehensive step by step guide to walk you through selling on Amazon from beginning to end. And don’t feel overwhelmed if you get lost or if things are going a bit too fast, bookmark this video so you can review it anytime and to make things even easier, I’ve included chapter markers and timestamps in the video description so you can jump to a specific chapter that you’d like to review.
Alright, so first thing that you need to do to start your Amazon journey is smash the like button for the Youtube algorithm! Ok, so doing that might not directly help you with your journey but it does help out this channel tremendously by letting the youtube algorithm know that you enjoy this type of content and to show it to more people just like you and I would really appreciate, so thank you. Now with that said, let’s get started.
Now, there’s several different ways you can sell on Amazon such as wholesale, arbitrage and private label. I personally do private label and it’s the method that I’m most familiar with and successful with and in my opinion gives you the most control over the product and profitability.
So, starting from the beginning, what is Amazon FBA and private labeling? Well, Amazon FBA stands for Fulfillment By Amazon. This is a service where Amazon will do all of the order fulfillment, picking and packing, shipping and customer service for you. All you have to do as a seller is ship your products to the Amazon fulfillment centers and each time you sell a product, Amazon take care of everything for you. It really is that simple and truly a hands off business model, which I love.
Private label, unlike wholesale or arbitrage where you’re reselling other companies branded products, you’re selling your own branded generic products. These are products that are sold under your own brand and are not patented or trademarked. Private label is the most hands off and scalable business model in my opinion.
Ok, so now that you know how FBA and private label works, how much money do you need to get started? Well, to give you a rough estimate based on my experience, to properly start an Amazon private label business, you should expect somewhere in the neighborhood of $3-5000. Now, if you heard that you can start an Amazon business with as little as $500-$1000, just realize that that is highly unlikely. Most of that type of content is click bait. If it sounds too good to be true, it probably is. Selling on Amazon isn’t a get rich quick scheme. It will require a lot of your time and dedication and if you follow all of the proven steps and strategies, you can expect to see profits within 3-6 months. So, if you were expecting to make 5 figures within the first couple of months, I suggest that you manage your expectations. Now, if you want to learn the breakdown of all the start up costs, I do have a video that goes in to detail on this and I’ll leave a link it in the video description below.
Ok, so before you do anything else, the first step you need to do is see if you’re even allowed to sell on Amazon. There’s no point to moving forward if you’re not allowed to sell on Amazon. For the most part, any one can sell in any Amazon marketplace from anywhere in the world. However, Amazon does have a few restrictions. Amazon has a published list of countries that allowed to sell on Amazon. If you happen to live in one of the countries not on this list, then you’re not allowed to sell on Amazon. However, there are work arounds such as setting up a business in one of the approved countries, however, doing that is beyond the scope of this video.
Approved Countries to Sell
Amazon also has a list of approved countries where they support payment disbursements from. Meaning, if you don’t have a bank account from a country on this list, Amazon will not be able to pay you your disbursements from your sales. There’s also several workarounds if you don’t have a bank account in an approved country, but I’ll cover that later.
Approved Countries for Disbursements
Alright, now while setting up your new seller account, Amazon will ask you if you’re setting up your seller account as an individual or business. Now, Amazon doesn’t require you to have a registered business to sell on Amazon so, if you want to sell as an individual, you can. You’d just be filing all of your revenue as personal income and you wouldn’t get any tax benefits or liability protection that a registered business can offer. Registering a business is pretty easy. You can do it yourself but the process and costs vary by state so visit your local states government website for more info or you can hire a service like Legal Zoom to help you for a small fee. You can always start your Amazon business as an individual and as you grow, register a business and change your account type at that time. As for which type of business to setup such as a Sole Propreitor or LLC, I recommend speaking to a professional to see which option is best for your own individual needs.
Legal Zoom
Business Types:
Ok, so the first step in setting up your new seller account is choosing which seller plan you want. There’s two plans you can choose from and here’s where it can get confusing for some people. You can choose the Individual seller plan and the Professional seller plan. The Individual Plan you see here is not the same thing as the individual business type. The individual business type means you don’t have a registered business. The Individual plan here is one of two plans. The individual plan is free, there’s monthly fee, however, you have to pay a $0.99 fee each time you make a sale, whereas with the Professional Plan costs $39.99/mo and as you can see here, if you sell more than 40 units/mo, it’s not worth it to have the individual plan. You also get access to all of these selling and advertising features with the Professional Plan. What I suggest is start with the Individual plan so you can get used to the system and upgrade to the Professional once your about to launch your first product and you need the extra features.
Seller Accounts
https://sell.amazon.com/pricing.html?ref_=sdus_soa_priov_n
A couple of pro tips when signing up for your seller account. I suggest using a separate email account for your seller account than your personal Amazon account that you buy stuff with. This will make your book keeping a lot easier by keeping your business separate from your personal activities.
During the sign up process, Amazon has become very strict with new seller accounts and will verify all of the information that you submit to prevent bad sellers from getting on board. Amazon has a detailed guide that includes all of the required documentation that you’ll need in order to get verified, so make sure you read through this and have all of your information and documentation ready. Make you use your real information as the documents you submit to verify your identity will all need to match. The name and addresses need to match. If they don’t, it can create delays in the approval process. Also make sure the address is a real address that can accept mail so if Amazon sends you a mail verification to that address, you can receive it. Amazon is also doing phone verifications now, so make sure your phone number is valid. Also, make sure that your utility bill and banking details all match with the primary account holders name and address. If they don’t, use a different bill or call your bank or utility service and have the information updated to match before signing up on Amazon.
Amazon will also require you to have a bank account and valid credit card. Amazon sends your disbursements to your bank account and if you owe any money, they will charge it to your credit card.
Now, if you don’t have a bank account in one of the approved countries like I mentioned earlier, you can use a service like Wise.com to set up a bank account and credit card. Wise is free and you don’t need a US address or SSN to setup an account on Wise. With Wise, you’ll get a bank account and credit card that you can use on Amazon.
Now, I’ve set up several accounts for myself and they were all approved within 24 hours however, I know other people have had difficulty with getting their new accounts verified. This is usually because the documents they submitted were hard to read, didn’t have matching details, submitted incorrectly or was the wrong type of document. If that happens to you, don’t be discouraged or afraid, just fix the problem and resubmit your information. If you want to learn more about how to sign up for a new seller account without getting rejected, I’ll leave a link to a detailed video in the description below.
Verification/rejection
Alright, so once you have your seller account set up, the next step is to find a viable product to sell. Now, back in the day, actually, not that long ago to be honest, finding viable products had far more risk and was more of a gamble because there wasn’t any tools available to gather any real tangible data on the product or niche that you can use. You basically chose products based on market trends or an educated guess. But lucky for us, nowadays, there’s powerful product research tools that make analyzing product ideas much easier.
But before we dive into product research, I want to cover an important step that almost everyone fails to do, and that’s putting together a plan. How are you going to know if you’ve found a viable product to sell if you don’t know ahead of time what you’re looking for? When it comes to finding viable products, you need to know what your goal is and what metrics are required in order to meet that goal. In this case, I’m assuming your goal is to make money. So, take a minute and think about how much profit you realistically want to make each month. Is it $1000/mo? Is it $10,000/mo? Be realistic. Once you know how much you want to earn, then we can figure out what type of product you’ll need to find in order to achieve that goal.
For example, if you want to make $3000/mo profit, how many items would you need to sell every month? Well, to figure that out, you need to know how much the profit margin is for each item you sell. And since you don’t know what you’re selling yet, you’ll have to make an educated guess. What I recommend is aiming for a minimum of $5 profit margin, ideally $10. A lot of people will use percentages when they talk about profit margin and will tell you to aim for like 30-50% profit margins but I don’t like to use percentages because it’s relative. If your product costs $1 and you have a 50% profit margin, which may seem like a lot but that’s only a profit of $0.50 on each sale. So in order to make $3000/mo you’d have to sell 6000 units. That’s 200 units/day! What’s more realistic is selling 5 or 10 units/day. And with a $10 profit margin, you’d only need to sell 10 items a day to hit your goal of $3000/mo. Make sense? These numbers will come in handy shortly. That’s why it’s important that you think about this first so you have a plan and you know what these numbers are for your own situation.
Alright, so the product research tool that I use and recommend is Helium 10. It has all several tiers for you to choose from and includes all the tools and features that you’ll need to follow the steps and strategies that I cover to succeed. I’ve also worked together with h10 to get all of you the best deal out there. Not only can you try it for free but by using my discount, you’re not going to find it cheaper anywhere else. I’ll leave a link to the coupon in the video description below.
Now, there’s many advanced product research strategies that I go over on my channel but they’re beyond the scope of this video. For beginners, the strategy I’m going to show you here is in fact how I found my first product. The hardest part of doing product research is actually the product discovery process. It’s impossible for anyone to just sit around and dream up enough different product ideas to research. In order to find a viable product idea to sell on Amazon, you need access to an endless list of product ideas that you can analyze.
So, instead of trying to think up product ideas on your own, the two primary tools you’ll be using are the product database call Black Box and the Chrome Extension. With the product database, you can sort through thousands of different product opportunities simply by changing different search parameters. The product database allows you to find items in Amazon’s marketplace that match specific search criteria that you set using filters. And the chrome extension allows you to quickly and easily analyze niches by displaying all the relevant data in a convenient window for you to analyze.
Ok, so this is what the Black Box on Helium 10 like. It’s a great place to start looking for viable products and it’ll let you get used to looking at specific data and metrics and familiarizing yourself with what the different filters mean.
Now, this strategy will work in any marketplace but if you’re planning to sell in the US marketplace, choose US. Then pick the categories you want to find products to sell in. I personally only choose specific categories as you can see here. I avoid these categories because, like clothing and shoes, there’s way too many variations and returns to deal with. Electronics break all the time and can be hard to use. I avoid anything that you ingest, put in or on your body like lotions and creams because I just don’t want to be liable if someone get injured or hurt. Toys and games is way too competitive and the lifecycle of the products is way too short.
Set the maximum reviews to 300. Reviews is how we determine how competitive a niche is. You want to find niches that have low competition. Niches where most of the products have a lot of reviews will be much more difficult and expensive to break into.
I suggest sticking with Standard size products, oversize can be a logistical nightmare with extremely high fees. Set the max weight to 2lb, anything heavier will be considered over weight and the fees will be higher. And for seller types, select All.
In the sales section, I suggest setting the price range between $15 and $50 to start. I don’t recommend selling products that are less than $15 because if you subtract your manufacturing costs and Amazon fees, there won’t be any money left for profit. You can use the rule of thirds here. Typically, ⅓ will go to manufacturing, ⅓ to fees and the last third profit, so at $15, you’ll make around $5. Anything less and you won’t have any margin to absorb any additional or unexpected costs. Now, in the current economy, if you can afford it, what I highly recommend is sellinig high ticket products. These are products that are $50 and higher. High ticket products generally have higher profit margins and due to the higher costs, it’s a barrier to entry for most people so the competition is far less. The only issue is that these types of products aren’t impulse buys, so you need to be far more diligent with your product listing optimization.
So, instead of just putting $15 here like what most people will do. Most people will just set round numbers here, but I want to think outside the box and go slightly beyond the range to capture any listings that are priced close to the minimum and maximum price range, since sellers like to use different pricing strategies. So, I’m going to put $14.97 and $50.25. It’s not rocket science, you can use any decimal amount.
Now, remember the rule of thirds that I mentioned earlier? If your goal is to make $3000 in profit every month, then using the rule of thirds, you can roughly estimate that you’ll need to find a product that generates around $9000 in revenue per month. A third is your manufacturing costs, a third goes to Amazon fees and the last third is profit. So set the minimum revenue to $9000. I’m actually going to set it lower to $6000, again thinking outside the box, I want to capture any outlier products that might be selling decently well but if I can improve it, perhaps it will meet my revenue target.
Now, remember the planning we did earlier? If your monthly profit goal is $3000, then with a product that has a $5 profit margin, you’ll need to sell 600 units per month, whereas with a $10 profit margin, you’d need to sell 300 units per month. Make sense now? So, let’s set the minimum monthly sales to 300. That’s a good starting point based on the target sales and profit goals that I mentioned earlier and a product with a $10 profit margin.
Ok, keep in mind that none of these search criteria are set in stone. You can play around with them to find different products. For example, you can set a maximum review rating, which is how many stars a listing has based on the reviews to 3.5 or something, so you can specifically look for products that are selling well despite having poor reviews.
Now when we click Search, Black Box will pull up a list of all the products on Amazon that match our search criteria. You can see the product image, title, price, monthly sales and revenue, the number of review and the review rating, how old the listing is and a ton of other metrics.
A pro tip here is if you notice, a lot of listings made it passed the filters that we set. Listings such as clothing, food, and brand name products like you can see here. So, what I do is I have a ton of keywords that I want to exclude from the search results. This is an evolving list of keywords that I’ve built over the years. If I keep seeing the same type of product showing up in the search, then I’ll add the product keyword to the list. For example, you can see here I have, men’s, women’s, mens, womens, nike, under armor, shirt, pants, sock, and so on. The key is making your product research as efficient as possible. Anything you can do to save time and energy will pay you in spades. I’ll post this list of keywords in the description below if you want to copy them.
Now, back the search results, I’m going to make analyzing this really easy for you. Ignore all of the data you see. What I do is I browse through these listings looking for products that catch my eye. I look at the main photo and the title. Products that I don’t immediately recognize or look strange and out of the ordinary are the best ones to look for. If I recognize what the product is, I skip it. Those products are almost always saturated and way too competitive and there’s no sense wasting time analyzing them. The key to finding viable products is efficiency. When you have hundreds or thousands of potential products to look at, you want to only spend extra time on the one’s that have the most potential. Spending an extra 2-3 minutes on every product adds up. The thing is, you don’t know when you’ll find your next product. It could take a day or two or it could take a couple of weeks or longer. Each one of my products took around 2 weeks to find and validate. So, you need to practice patience and manage your expectations. Product research is the most important step to selling on Amazon. If you end up with a bad product idea, no matter how well you do everything else, it simply won’t sell well. It pays to do your due diligence.
Ok, so back to the results, a pro-tip here is, I like to set the page size to 100 so there’s less page loading and I actually work backwards through the results starting on the last page as everyone almost always start on page 1. I want to find products that other people might not be seeing. Remember, you really need to always be thinking outside the box.
*****
Ok, so, when I find a product that catches my eye, like this Shower Filter Capsule, it doesn’t automatically mean it’s a good product idea to pursue. This is just one listing that happens to meet the criteria that we set in the filters. What you need to do is take a look at the entire product niche and see how well all of the top sellers doing and see if the entire niche as whole, it makes sense to sell that product.
To do that, you need to do a search for the product using the main keyword for that product. I’ll figure out what I believe the main keyword is and do search on Amazon for this product. In this case, I believe the main keyword is “shower filter”, so head over to Amazon, make sure All Departments is selected and do a search for shower filter. Make sure that the majority of the listings that come up are indeed the same product you’re looking at, otherwise, you’re doing a search using the wrong keyword. In this case, it looks right, so we can pull up the Helium 10 Chrome extension call X Ray.
Filter (page 5)
Now, as you can see here, Xray has pulled up a ton of info for each listing such as the monthly sales, total revenue, historical sales and ton of other relevant data. This is such a powerful tool because it displays all of this data for you to quickly analyze. Data that you would never have access to otherwise.
Now, deep diving in to how to analyze niches is beyond the scope of this video but I’ll go over a few of the key points. First, you can see that Xray has pulled up several metrics for the top listings in the search results. Its important at this point, that you do not resort these listings or rearrange them. This is a common mistake many beginners make. The default order that you see is exactly how the listings are organically sorted in the search results by Amazon. You want to analyze niches with the listings arranged in their organic order. This is because these top listings, especially the listings on the first page of the search results, are the listings you’ll be competing directly against. If you resort the listings, you could be looking at listings that may have sold well 6 months ago but are no longer selling, or the niche has tanked in the last few months and is no longer a good product idea. So don’t sort the listings by sales or revenue or whatever that I see a lot people doing.
You also want to ignore all the sponsored listings. These are the listings that say Sponsored next to them. These are placed here based on the PPC advertising system. Basically, whoever bids the highest for specific keywords get the best ad placement, so those listings aren’t placed there organically. You can see these same listings here in X-Ray with the SP logo next to them. You want to ignore these. You can actually turn these off so they don’t show up at all in the chrome extension by clicking on Filter Results and choose Hide sponsored products.
Now, by analysing the data, such as the price, sales volume, revenue and reviews, you can determine if this niche meets the criteria you set out in your plan and if it’s able to hit your profit and sales goals. It’s important that you do you this. Just because one or a few of the listings are making a lot of sales, doesn’t mean that it’s a good niche. You need to make sure there is enough demand, the competition is relatively low and most importantly, that you can break into the niche and capture a part of the market and hit your profit and sales targets. For example, are most of the listings selling 300 or more sales per month? Are most of the listings selling around $6000/month?
Now, it’s important that you don’t be lazy and make any decisions based solely on the averages that you see at the top here. Always analyze the actual data of all of the top listings. Averages don’t accurately represent the niche as a whole. For example, it only takes one or two listings with really high or really low figures to throw off the average.
So, physically count, are most of the top 12-15 listings selling 300 units or more each month? Are most of them doing at least $6000 in revenue each month? And to make sure that the competition isn’t too high or if the niche is saturated, do most of listings have less than 300 reviews? Are most of the listings 3-6 months old? Additionally, you also want to make sure that the niche isn’t brand dominated, meaning there’s no brands that have more than 3-4 listings in the top 10. You also want to make sure the product is seasonal, patented or trademarked.
Again, this is just the basics, I’ll leave a link to a very detailed video on how to properly do product research in the video description below.
*****
While you’re analyzing products, you want to keep in mind how you can differentiate. You can’t just sell the exact same thing as the other sellers and expect to do well. You need to have a competitive advantage, otherwise, you can only compete based on price and you never want to do that because it will always end up in a price war and a race to the bottom where everyone keeps lowering the price until no one is making any money. You always want to differentiate and offer a high quality premium product so you have a competitive advantage and more importantly, you can charge more. Now, there’s several ways you can differentiate. A method I like to use is to look at the reviews on the competitors listings and see what people are complaining about. You can find excellent ideas on how to fix a problem, add feature or improve it. One of my favorite ways to differentiate is by bundling. This is adding a small bonus item to the product that doesn’t add much costs but adds a ton of value. You can get bundling ideas by looking at the frequently bought together section in the listings or buy using your own intuition. Just make sure that you’re not pairing two main items togethers and that the bonus item makes sense to pair with the main product. The bundled item should be a small bonus that the buyer is essentially getting for free, for example, if I’m selling a yoga mat, I could bundle it with a small resistance band. However, bundling the yoga mat with a back pack wouldn’t make sense. In todays economy, don’t think you can differentiate simply by having a better listing. Nowadays, all the top sellers will have top notch, fully optimized listings with excellent professional photos and copy. You should always have a top notch quality listing anyways but I’ve seen some niches where all the listings are terrible.
Now, beyond making sure that the product meets all of the research criteria and you’ve identified a method to differentiate, there’s also a few things you should consider. You want to make sure that product is small and lightweight. Ideally, you want the product to be able to fit inside a shoebox and weigh less than a pound. Otherwise, the shipping and Amazon fees will be much higher. Also make sure that the product is easy to manufacture. The more complicated it is, like if it has a ton of pieces, moving parts, or requires assembly, there can be quality control issues as well as much higher manufacturing costs. Especially if you want to differentiate and it requires retooling or new molds. I also suggest staying away from products that are difficult to operate, require instructions, can break easily, electronic devices or anything that can be a liability where someone can get hurt like food, lotions, creams or anything that would go in or on your body. Or products that people often return like clothing or toys. It’s not worth the risk or getting bad reviews.
And lastly, one of the most important product research mistakes I see people making is not making sure ahead of time that they are allowed to sell the product on Amazon. Some products are prohibited or have restrictions in order to sell them on Amazon. With prohibited products, you can’t sell them on Amazon period. So make sure you find out ahead of time before you invest any money on inventory. Restricted products may need approval before you can sell them. Additionally, some products fall under what’s called gated categories. That means you need to apply for approval in that category before you can sell products in that category. Many of these gated categories are actually pretty easy to get approval for, you just have to answer a few questions and you’ll get instant approval. However, other categories may be more involved and will require you to submit invoices or certifications. If you refer to this list of gated categories, it’ll tell you what you need to do and what the requirements are. Keep in mind, some main categories that are not gated may have subcategories that are gated.
Gated Categories
Also, some products must meet specific compliance requirements or certifications in order to sell on Amazon such as hazmat, FDA or CPC certifications. Amazon actually just released a new compliance tool to make it easier for sellers to check if the product has any of these requirements. I’ll leave a link to this new tool in the video description below but it’s actually really simple to use. Just do a search for the products keyword and the tool will tell you what requirements are necessary for you to sell it on Amazon. For example, if you want to sell baby pacifiers, you can see that it says you need to have the following requirements. CPSIA as well as these certifications. Test reports that meet CPSA section 14 a5. A childrens product certificate or CPC. As well as a Test reports from a CPSC-accepted lab. Also be aware that if you don’t find your product using the tool, it doesn’t necessarily mean that there isn’t any requirements. Make sure you refer to the prohibited and restricted products pages as well as speak to a Seller Support agent to verify. Always do your due diligence.
Product Compliance
Compliance Tool
And last, I see far too many beginners get in trouble selling products that are patented or trademarked. Selling patented or trademarked products will require you to get permission from the IP owner in order for you to sell them on Amazon. I personally suggest avoiding patented and trademarked products, it’s far too much of a pain and risk. Just because you see other sellers selling the product doesn’t mean you can. They may have gotten permission or they simply haven’t been caught yet. And don’t believe what your manufacturer tells you. They may not know the that the product is patented or trademarked and if you decide to sell it, your products are considered counterfeit and the responsibility falls on you, not them. Again, I’ll leave links in the description below if you want to learn more about these restrictions and requirements.
Alright, so now that you’ve found a product, you need to find a supplier to manufacturer it. The most cost effective place to get your products made is overseas in China. You can use a website called Alibaba to find suppliers. Alibaba is basically a huge database of manufacturers where you can find pretty much any product you can think of. You can just do a search for the product you want to sell and you’ll get a list of all the suppliers that manufacture them.
For example, if we’re looking to sell the shower filter, do a search and Alibaba will pull up a huge list of all the suppliers that manufacture them. You can see how long the supplier has been on Alibaba, their reviews, as well as what the price and minimum order quantity is.
Now before moving forward with your product idea, you can go one step further to verify if the product is viable by double checking whether it will even be profitable. By looking at the list of suppliers, you can now get a rough estimate of what the unit cost is and with that info, you can get an estimate of what your monthly profit will be and if you can hit your profit target.
For example, if we take a look at the list of suppliers, we can see that the average price per unit is around $3.50. And you can see that on some of these listings, what the shipping price is. For example on this one, to ship 30 units, the shipping cost per unit is around $1.00. This is a good starting point.
Now, if jump back to one of the shower filter product listings, we can use the built in profit calculator. Click on one of the competitors on the list. Then choose Profitability Calculator. You can see that the product details have been pulled up for that product such as the sale price, product dimensions and weight. These metrics are all necessary in order to calculate the proper fees. Now we can leave the default figures that this seller has for their product or you can change the Sale price or how much it costs to manufacture as well as the costs to ship to Amazon. For example, leave the sale price as it and we change the unit cost to $3.50, it will tell you how much profit you’re making if you were to sell the exact same or similar product. You can see in this case that the FBA fees are this and your profit is here. Pretty cool right?
Now, if you don’t have Helium 10, you can use Amazon’s FBA calculator. I’ll leave a link to it in the description below. Grab the asin of one the competitors, you can find the asin the URL, it always starts with a B0. Copy it and paste it here and you can see that it pulls up all the product details for you and just like the helium 10 calculator, you can edit the Sale price, how much it costs to manufacture and ship to Amazon, it will tell you how much profit you’re making.
Can you see how powerful this is by taking these extra steps? If the profit margin doesn’t meet your target and you can’t think of a way to lower your cost or add value so that you can increase the sale price, then this may not be a viable product idea.
Now, if the product does meet your profit target, then you’ll need to find a supplier to manufacture the product. What you want to do is make sure you select Trade Assurance and Verified Supplier. This will filter out the suppliers that accept trade assurance and are verified suppliers on Alibaba. A verified supplier is a manufacturer that has been vetted by Alibaba and has a proven historical track record. Trade Assurance is Alibaba’s secure payment is protection service where your payment is held in basically an Escrow, and only when the transaction has been completed in accordance with the contract will Alibaba release the payment to the manufacturer, things like the quality of the product and on-time delivery, otherwise, you can get a refund. By selecting the Verified Supplier and Trade Assurance filters, only suppliers that have been vetted and agree to use the Trade Assurance service will show up in the search results.
(on screen)
Alibaba also offers product inspection services to ensure that the final product meets your requirements and I’ll go over this later on in the video. Alibaba also gives you additional information on each manufacturer to help you vet them such as how long they’ve been on Alibaba as well as a star rating like you can see here. These metrics will help you in making sure you’re only working with the most reliable and trustworthy manufacturers.
Ok, so when it comes to contacting manufacturers, don’t just contact a couple that you think are the best option for you, like the ones with the lowest price or lowest MOQ. You want to contact around 20 to 30 or more and this is for several reasons. First, don’t be surprised but you probably won’t even get a reply from many of them. While others may be slow to respond, you might not hear from them in several days or weeks. With suppliers like that, you obviously don’t want to work with them. It’d be a nightmare. Some suppliers may have poor communication skills, like they don’t speak English well or are difficult to understand. I suggest avoiding suppliers in those cases as well, make sure you stick to manufacturers that respond quickly, communicate well and also thoroughly answer the questions that you have. This is so you can avoid any potential miscommunications or misunderstandings. Remember, you’re trying to build a long-term working relationship and you want to work with someone that is easy to deal with. And of course, the more people you contact, the more quotes you can get to find the best price and option to go with.
Now, if you’ve tried to contact suppliers in the past and didn’t get many responses or got extremely high quotes, it’s probably because you didn’t sound professional during the correspondence. Remember, these suppliers are probably getting dozens of inquiries every day and they’re going to quickly filter out the ones that they don’t think are serious and a waste of time. Now, don’t worry I have you covered. I’ll leave a link in the video description to a contact template that you can download and use for free. This is the exact same template that I use to contact suppliers. It sounds professional and has all the details and information that you’ll need to get from the supplier in a single correspondence so you don’t need to go back and forth several times to get the information you need, which because of the time zone difference can take several days. Just customize the template for each supplier, replace the fields with your own details and fill in the template with the product details and copy and paste it into the contact supplier inquiry form. And make sure you’re not contacting the same supplier twice. It’s not uncommon for suppliers to have multiple listings so make sure you’re keeping track of who you’re contacting. It doesn’t look professional sending the same email to the same supplier several times.
(on screen)
Alright, so once you’ve contacted suppliers, received quotes and negotiated the price and MOQ, narrow down the list to your best 3-4 suppliers. Keep in mind though, the best price may not be the best option. Always consider the quality, service, delivery times as well as the price. Then order samples. Always get samples so you can physically see, touch and feel the product and judge it’s quality. Not every manufacturer is going to produce the same level of quality. Samples are typically free but you have to pay for the shipping which is usually around $50-75 each but the supplier that you end up working with will usually reimburse you the cost of that sample so make sure to mention that to them when you place your order.
So after receiving the samples, you should be able to make your final decision on which supplier you want to work with. Make sure that you’ve discussed the shipping terms as well. Not all suppliers will or can ship your products for you. I suggest always asking them what they can do for you as well as contacting freight forwarders to get a shipping quote. Then you can compare to see which option is best for you. If you’d like to learn more about how the shipping process works and what the shipping terms like EXW, FOB and DDP mean, I have a separate video on this which I’ll post a link to in the video description.
Once you have an idea of the quality of the products, you can further negotiate with all the suppliers or if you have any changes you want to make you can communicate that to them. Keep in mind that everything is negotiable, so if one supplier is offering something that another isn’t, you can try to negotiate to get better terms for yourself. You just have to be willing to walk away if they aren’t willing to meet your requests. Also, keep in mind that sometimes the best price may not be the best choice. Consider how well they communicate, the quality of the products, how quickly they can complete the order, the price on future orders, for example, the initial cost for your small first order may be a bit higher but they’re willing to offer you a better deal on future orders when you place a larger order etc etc. Use all of these metrics to help you vet the suppliers and narrow them down to a single supplier.
A pro tip here is, when you initially contact the suppliers, it’ll most likely be through the alibaba messaging system. Most suppliers may probably ask you to continue the conversations on Skype, Whatsapp or Wechat and that’s totally normal. The Alibaba messaging system is cumbersome to use. Just make sure that everything you’ve negotiated and discussed outside of Alibaba’s messaging system, you then accurately document in your purchase order agreement so that Alibaba has a record of it since none of the conversations are recorded in their chat system.
Speaking of purchase agreements. I also have a purchase agreement template that you can download and use. I highly suggest you use it because it covers everything you need to include in a purchase agreement from what each party is responsible for to all the terms and conditions. You can easily taylor it to suit your needs and I’ll leave a link to it in the video description below.
Now, once all of that is said and done, you’re supplier will want you to pay for your order before they’ll start manufacturing. Don’t be surprised if they want you to pay 100% of the cost up front. However, that wouldn’t be very smart in your case. Typical payment terms are 30-50% upfront and balance upon completion. Just whatever you do, don’t pay 100% upfront. You also want to make sure you’re protecting yourself with how you make your payment. Do not pay using a wire transfer or bank transfer. You’ll have absolutely no protection. Once the money leaves your account, it’s gone. If something goes wrong, you have no means of recourse. What I suggest is use Alibaba’s Trade Assurance and pay using Paypal or a credit card to pay for your order so if something happens, you can file a dispute through Trade Assurance, Paypal or your credit card company. Ideally, I recommend using Paypal AND setting up your credit card as the payment method on paypal. That way, if for whatever reason Paypal denies your claim, you can still file a claim with your credit card company.
Now, once your supplier has completed manufacturing your products, one important step is to have a product inspection done. I can’t emphasize how important this step is. There have been times when the quality of the final production units don’t match the quality of the samples, or there was some miscommunication and the products were made wrong. Always have an inspection done. And always have the inspection done before your products leave their factory. I’ve seen people try to save some money and have the products shipped to their home so they can inspect it themselves. Do not do that. If something is wrong, the logistics and cost to ship the products back to china will be prohibitive alone. And in most cases, the supplier will deny any liability. That’s why it’s important to have the inspection done before the products leave your supplier, that way your supplier can’t deny any responsibilty. And again, make sure to use the free purchase order template I have because there’s a clause in there stating that a product inspection will be done at your expense, however if the inspection fails, your supplier will need to fix the problems and pay for the second inspection.
Now, in some instances such as when the product is extremely simple and easy to manufacture, you could consider to just have your supplier send you detailed photos of your product at varying stages of production so you can verify that they are being done correctly. Or do a live video chat or facetime call so you can see them. You’d have to decide if it’s worth it to get an actual inspection or not based on your risk tolerance. Inspections aren’t that expensive and is good piece of mind. A typical inspection costs around $150-300 depending on what you want checked.
Ok, so once you have your product taken care of, another thing to consider is your branding and product packaging. I would ask your supplier what their standard packaging is for the product and decide if it’s what you want. If the packaging is some plain generic box or polybag, you may want to repackage it in something custom designed and more premium or decorative. By creating a custom designed package, you can add value to your product without much added cost. At the same time, you can also have your brand or logo printed on to the packaging to help increase your products perceived value and build your brand.
When it comes to naming your brand, I suggest choosing a brand name that is generic and not niche specific. Something niche specific locks you in to a specific type of product. For example, if you started selling soap dishes and your brand was Bath and Bodyworks, it wouldn’t make sense if you started selling cell phone cases with that brand. Something generic that isn’t niche specific would make more sense. I also suggest hiring a logo and package designer to create your package design and logo for you. You can find really good designers on fiverr.com. And at the same time, you can have them incorporate the Amazon barcode and any other required markings into the package design such as the country of origin. That will help you save some money instead of having to label them separately.
A pro tip is to also have your designer create an insert card that you can include inside the package. The insert card can thank them for their purchase and ask them to leave you a review. And here’s where buying the top competitors products would help you immensely. You can see what your competitors are doing, the quality their products, package design and insert cards and how you can improve on them. Just make sure that the insert card doesn’t violate any of Amazons insert card guidelines. I have a separate video on how to create powerful insert cards and I’ll leave a link to it in the description if you want to learn more about it.
Now, speaking of branding, Amazon doesn’t require you to have a registered brand or trademark to sell on Amazon. However, if you do register your brand, you get access to advance features such as brand protection, Brand Registry and A+ content, which means you can add videos to your listing, have much richer content in your listing description including photos and themes. You also get access to tools help prevent and remove listing hijackers and other intellectual property violators. You can register your trademark yourself directly through the USPTO.gov website. But be aware, if its something you plan on doing, it typically takes around 6-9 months to get registered. However, you can apply for Brand Registry on Amazon right away once you’ve submitted your trademark application and get your registration number.
Alright, so once your product is manufactured, you need to get it shipped from your supplier’s factory overseas to Amazon’s fulfillment center. This can be a complicated process, so I don’t recommend trying to do this yourself. I highly suggest that you hire a freight forwarder to handle this for you. Arranging the shipment and filling out the paperwork must all be done correctly, otherwise your shipment can be lost, held up somewhere, incur penalties, or sent back to your supplier. You can find a freight forwarder on alibaba or on freightos.com. I’ll leave links to these pages in the description below.
Keep in mind that shipping by air is the most expensive, however it is the quickest. Shipments typically take 7-10 business days, whereas shipping by sea is the cheaper method but can take 3-8 weeks. What I suggest is for your first order, which is usually pretty small, ship it by air so you can start selling right away. Then on future orders, you can either ship it entirely by sea or split the shipment up, shipping some by air and the bulk by sea once you understand your sales velocity and can manage your inventory to accommodate the 3-8 week shipping time. Be aware that ever since covid, the entire supply chain has been affected. Everything from materials availabiliity, to manufacturing, shipping and customs are extremely delayed. And this includes Amazon processing inbound shipments at their warehouses.
Now, one thing to consider is to ask your supplier if they will ship your products for you. Some may, some may not. Some may only ship it to the local port. Ask them and see what they’re willing to do and if they offer DDP shipping. DDP is an inco-term which means they will arrange the entire shipment and take responsibility for it from their factory all the way to Amazon’s fulfillment center. You just need to pay your supplier. Doing this can cut out the FF and can save on time dealing with logistics and costs. So, get quotes from your supplier as well as from several FF’s and see which option will work best for you. If you want to learn more about how shipping from China to Amazon works and how you can save money, I’ll leave a link to a video in the description below.
Now, before you can physically ship your product though, Amazon requires you to create a shipping plan so that they know what to expect when your shipment arrives at their fulfilment center and who it belongs to. You can create the shipping plan in seller central. But in order to create a shipping plan, you need to have a verified seller account and have created the listing for your product. So, if you haven’t already completed those steps, you’ll have to do them first. I realize this is out of order but I’ll go over how to create your product listing in the next part of this video.
Now, a couple of key points to note when creating the shipping plan is to make sure you choose Individually Packed vs Case packed. Individually packed means inside each shipping carton, you can have mixed products and each shipping carton doesn’t have to be exactly the same size or contain the same products or quantities. Whereas case packed means every carton is exactly the same and contains the exact same product and quantity. Even if your product is cased packed, I suggest always choose individually packed. This is because if for whatever reason, your supplier packaged your shipment in different sized cartons or put a different number inside the cartons, if you choose case packed, you won’t have the ability to enter different sized shipping cartons. You’ll thank me later.
Also want to make sure that you choose Merchant for who labels. This means you are going to put the Amazon barcode on all of your units, not amazon. You meaning your supplier. If you don’t have your supplier do it, you can have Amazon do it but Amazon will charge you $0.55/unit.
FBA Label service
You also want to make sure that you enter the dimesions and weight for your unit and cartons in the correct place. If you enter the shipping carton size and weight as the unit size and weight, it will throw off a bunch of calculations, your product will most likely end up being classified as oversize, you’ll notice that your FBA fees are exorbitant and you’ll get an error that you dont’ have enough storage space. So make sure you don’t mix those up.
One thing I want to point out is, you’re most likely going to always choose SPD here, unless you’re shipping a huge shipment where you’re taking up a half or an entire container. And a pro tip, Amazon offers deeply discounted shipping rates for domestic shipments if you use their Partnered Carrier Program. Because Amazon do so much shipping volume, you can save a ton of money on your domestic shipment, so talk to your freight forwarder and see if you can take advantage of that for the domestic portion of your shipment.
And while we’re here, take note that new seller accounts typically have a storage limit of 1000 units. You can see what your storage limit is on the bottom of the shipping queue page. Double check to verify what your limit is because if you place an order with your supplier that is more than what your storage limit is, then you can only ship inventory up to your limit to Amazon and you’re going to have to find a solution to store the extra units somewhere else, either at your home, a storage unit or 3PL.
Amazon recently upgraded the shipping plan workflow and it can be quite confusing navigating the new system, so if you want to learn how to use it, I’ll leave a link to a detailed video in the description below.
Once you’ve completed the shipping plan, you can then print out the shipping labels which will have the Amazon fulfillment center addresses on them. You can actually download the shipping labels and email them to your supplier so they can put them on the shipping cartons. If there’s more than one carton, make sure the correct labels go on the corresponding cartons.
Alright and now onto creating your product listing. In seller central, click Menu > Catalog > Add Products.
Because we’re doing private label, click on I’m adding a product not sold on Amazon. Don’t enter anything in the search field. Now, in the search field, type in your product and amazon will find the correct category for your product. Select the category. And now, you’ll need to fill out details for your product listing. Anything in highlighted in red or a tab at the top with the red exclamation mark, means there are required fields that you haven’t completed yet or have invalid data. You won’t be able to complete the listing unless you’ve filled in those fields at a minimum.
One thing to note, in order to create a listing for private label products, you need to purchase a UPC barcode. Amazon’s UPC barcode policy states that you need to buy your barcode directly from GS1 or you risk having your listings shut down. In the past, sellers would buy barcodes from 3rd party resellers like barcodes mania or nationwide barcodes for around $10 each to save some money, which is what I used to do, since GS1 barcodes used to cost $250. However GS1 has recently updated their pricing and it’s no longer worth while to do so. You can now buy official GS1 barcodes directly from GS1 for $30 as you can see here. You only need to buy one barcode for your product. Once you enter it into the listing here, you’ll never need it again. Barcodes and figuring out how many you need to buy can be confusing so if you want to learn more about them, I’ll leave a link to a detailed video in the description below.
Now, for the brand name, if you have a registered brand, enter it here. If you don’t, just make up a name. You don’t need to have a registered brand to sell on Amazon. Now, if you run in any errors when you choose your brand, I have a detailed video on how to resolve them and I’ll leave a link in the description below.
Ok. Now, a few important things I want to point out. When you’re creating your title, bullet points and description, you want to make sure that you’re using as many of the most relevant keywords as possible. You can get a list of all the most relevant keywords by using tools like keyword inspector and keywordtool.io, but these free options are very thorough. The best keyword research tool is Helium10’s Magnet. By enterinig in the seed keyword for your product, Magnet will generate a huge list of all the relevant keywords and keyword phrases for you. You can download the comprehensive list of all the relevant keywords for your product and use them to create the title, bullet points and description.
And I have a few pro tips for you. First, you can use another tool call Cerbero to do a reverse ASIN keyword search on your competitors listings and get the keywords your competitors are using. How powerful is that? Just grab the ASIN of the top sellers listings and enter it into Cerebro and you’ll get a list of the keywords they’re using.
Second, instead of just listing generic features in your bullet points, list 5 key benefits and how they help solve a problem for the buyer. People buy products to solve a problem they’re having. How does your product uniquely solve those issues? A test I like to use for my bullet points is if I can take my bullet points and place them on a competitors listing and they’ll work for their product, then those are poor bullet points.
Third, make sure you fill in the Generic Keywords field with keywords from your keyword list that you haven’t already used in your listing. The Generic Keywords field is also known as the backend keyword list. This field to help the Amazon A9 search algorithm further index your listing. But, you can see here, that it says, no repetition, no competitor brand names and no ASIN’s.
Now, Amazon recently change the whole add a new product workflow and changed a bunch of things. I have detailed step by step video that goes into how to create an optimized listing using the new workflow, so if you want to learn more about how to do that, I’ll leave a link in the description below.
Now, one important aspect of your listing that you can not underestimate is your product photos. The quality of your photos will make or break the success of your product. Unless you’re a professional product photographer, always hire a professional to take photos for your product. You can find product photographers on fiverr.com or even look locally in your city. And make sure that you follow Amazon’s guidelines too. The main photo must be on a pure white background, can’t have any Amazon logos or trademarks, and cannot have any text among a huge list of other stipulations. And to make sure the zoom feature works on your images, make sure the resolution is at least 1000px. Most categories will allow you to upload 9 images so make sure to use them all, however some categories may only let you upload 7 or less. Make sure that your photos easily communicate the benefits and features of your product. We humans are visual creatures, so we’d rather look at photos than read a bunch of text. So use lifestyle photos, infographics, comparison charts to show off your product as well as a clear indication of its physical size and dimensions. Again, i have a detailed video that goes over step by step how to create an optimized product listing and I’ll leave a link to it in the description below.
Photo Guidelines
Alright, now with your listing sorted, you’re ready to launch your product. One thing I want to point out is that your listing won’t be live in the Amazon marketplace until you have inventory in stock. So, even if you’ve got everything done and you have all of your ducks in a row, if Amazon hasn’t received your shipment or they haven’t processed your shipment yet and your listing says Inactive/Out of stock, then your listing isn’t live and no one can find your listing in the marketplace yet, so you’ll have to wait to start your product launch.
So, you might be asking, why do we need to do a product launch? Once your listing goes live in the Amazon marketplace, wouldn’t people just start buying it? Well, in fact, no, that’s not how it works. Amazon ranks listings primarily based on their daily sales velocity. What that means is when someone does a search on Amazon for something, the listings in the search results are arranged in the order of which listings sells the most each day. Now, there are several metrics that influence a listings rank. Amazon hasn’t actually made it public exactly what those metrics are but metrics like the sales history and conversion rate play a role however the daily sales velocity is the main driving factor. So, because you’re launching a brand new product with no sales history, your listing is in no mans land. It’ll either be on the last page of the search results like on page 30 or something where no one would every look, or it may not even show up at all in the search results. So why is this important? It’s important because you want to get your listing ranked onto the first page of the search results. Over 70% of all online sales take place on the first page of the search results and sales falls off exponentially for each subsequent page.
So, I can hear you asking now, well if no one can find my listing, how am I going to get sales? How am I going to get my listing ranked? Well, you’re right, it’s a catch 22. It’s one of those chicken before the egg conundrum.
So, what can you do? Well, you need to generate sales without relying solely on Amazon’s search algoritym and there’s several ways you can do that. You can have your friends and family buy your product but make sure they are not leaving reviews, that’s against Amazon’s TOS. You can promote your product in Facebook groups, on your own Facebook page or with online influencers. You can also do paid ads on Google and Facebook. However, the best strategy to get your initial sales is through Amazon own advertising feature such as promotions, coupons and PPC.
Promotions is a great way to generate sales by offering your product at a deep discount. I suggest offering a discount somewhere around 50-70% off. Promotions used to work really well when you could offer 80-90% off deals but recently if you do, Amazon may see it as rank manipulation, so I don’t suggest doing more than 70% off during product launches.
Coupons is also another great way to generate sales. These are the instant discounts buyers can activate from your product page like you can see here. It can also help with conversions since the coupon banner and discounted price catch peoples eye in the search results like you can see here.
Now, a pro-tip here is during the product launch, you want to make sure you’re pricing your product competitively so that there’s added incentive to buy from you instead of your competitors. What I suggest is starting around 20% higher than the lower end of the price range of your competitors. For example, if the price range for your niche is around $18-$28, then I’d set your price around $20-22 during the product launch. You don’t want to set the price too high since you don’t have any reviews or social proof yet and you don’t want to set the price too low as your product can be perceived as low quality. Once your product gains traction and moves up on to the first page, you can slowly raise the price to your target sale price and you can also stop running promotions and coupons at that time. And don’t expect to be making money during the product launch. With the promotions and coupons, you’ll probably be breaking even or even at a slight loss with each sale. This is just part of the business you’ll have to get through this to get your listing ranked.
Now, the best way to generate sales is to use Amazon’s PPC advertising system. PPC stands for Pay Per Click. This is Amazon’s advertising system where sellers can place bids on keywords to have their ads show up in the search results. These are the listings that you see in the search results that say Sponsored. You can find them at the top of the search results, in the middle and the bottom as well as on the product listings themselves. The seller with the highest bid gets the best ad placement, which is of course at the top of the first page but keep in mind, you’re only charged when someone clicks on your ad, not when it’s displayed.
There’s a few different options you can use for your PPC campaigns but the one that works best is the Sponsored Products campaign. Within the PPC campaigns, there’s two ways you can bid on keywords, you can either do an Automatic campaign or a Manual campaign. Automatic means amazon will choose relevant keywords for you based on your product and the keywords you’ve used in your listing. This is a good way to get started with PPC as you don’t have to do any additional work, Amazon is doing it all for you.
So, just to quickly walk you through creating a campaign, in seller central click on menu > advertising > campaign manager > Create Campaign > Choose Sponsored Products. Now give the campaign a name. It helps to be specific so when you have several campaigns, you can tell which is which. So for example, this one is for my can opener and we’re going to do automatic targeting. From the product list, choose your product. Campaigns can apply to more than one product such as if you have variations but I suggest keeping your campaigns separate for each individual product. Choose Automatic Targeting. For the bid amount, I suggest over bidding what the suggested bid is so you have a better chance of winning the top ad spot on the first page of the search results. So in this case, the suggest high bid is $1.62. Set it higher to something like $2.00. Now, a pro tip here. Just because you set your bid to $2.00 doesn’t mean Amazon will actually charge you $2.00 each time someone clicks on your ad. It just means you’re willing to bid up to $2.00. So if the next highest bid is $1.75, then Amazon will outbid it for you at $1.76. Make sense?
Now, I’m not going to go over the negative keyword section here. This section is for keywords or products that you specifically don’t want to bid on.
Now, for the bidding strategy, during the product launch, I recommend setting it to dynamic bids up and down.
Set the campaign name to the same name you choose earlier. Leave the date field alone.
And last, set the daily budget to what you can afford. I suggest at least $10-20. A pro tip here is I actually suggest setting your daily budget to $100. That way Amazon will try to show you ad more often. Remember, you don’t get charged unless someone clicks on your ad. Then throughout the day, check to see how much has been spend on the campaign and then pause the campaign when it reaches the amount that you actually want to spend. Then restart to campaign again the next day when it resets. Makes sense? Now, click on Launch Campaign.
Now, if you want more control over which keywords you want to bid on, you can choose Manual targeting. By choosing manual targeting, you can specify a list of keywords you want to bid on. This is where the keyword list you created earlier when you were building your product listing can be used again. Creating the campaign is the same as before, except choose Manual. Make sure to choose Keyword targeting. Then select Enter List then copy and paste your keywords here. Click Add keywords. Then launch campaign.
Now, I actually have a more advanced strategy for setting up your PPC campaigns that’s beyond the scope of this video but if you’d like to learn how I create and optimize my campaigns for a product launch, I’ll leave a link to a video in the description below.
Ok, before we finish up this video, there’s two important things I want to cover about product launches. First, when your new product listing goes live, there’s actually a short period of time called the honeymoon period where Amazon will give your listing a small boost in the rankings to see how well it will do and if it’ll gain any traction. It’s important that you take advantage of this honeymoon period by making sure that you’re listing is ready to go the instant your listing goes live. Meaning, you have your photos done and ready, the listing is fully optimized, the promotions, coupons and PPC are ready to go. You don’t want your listing to go live and you’re not ready because don’t have your photos done yet, or whatever.
And secondly, a huge advantage to help you generate sales is to have social proof on your listing. Your listing gets social proof by having positive reviews, the more the better. However, Amazon is very strict on how you can get reviews and will take aggressive action against sellers that try to manipulate the review system. So, what you can do to help get your initial reviews is by signing up for Amazon’s Vine program. This is where you can give a free product to a trusted reviewers in the vine program and they’ll leave a product review. This the quickest way to get reviews but is only available to sellers with a registered brand.
Another method is send a follow up email to your buyers asking them to leave a review. This method doesn’t work very well as most buyers have opted out from receiving emails and Amazon actually already sends emails out for you, asking your customers to leave a review.
I don’t suggest trading reviews in review groups or using review services. That’s the fastest way to get caught and get your selling privileges revoked.
Now, you’ll also organically get reviews just through your normal sales, however the average sales to review ratio is around 1%, meaning out of 100 sales, you might get 1 review. However, if you’re the more risk tolerant type, you can have your friends and family buy your product and leave a review but just realize that if you get caught, you’re putting account health at risk. But there’s a specific strategy that you must adhere to if you want to go this route so that you don’t get caught and I have a video that goes over this strategy and I’ll leave a link to it in the description below.
And last, for sticking around to the end, I have pro-tip for you. Once your product reaches the first page, don’t just set your sale price and forget it. Test different price points as well as different main photos and see which converts best. If you’ve differentiated your product really well, you may be surprised that you can actually sell your product at a much higher price point than you had originally expected.
But don’t raise or lower your price by large amounts or too frequently. If you do, you risk losing the buy box. The buy box is the Buy Button that’s on the product listing page. There’s actually a specific pricing strategy that I use and how to strategically change your price so that you don’t lose the buy box. I have video that goes over that which I’ll leave a link the description below if you want to learn more about it.
Alright! If you want to get in touch with me, you can find all of my contact details in the video description below. I’d love to hear your thoughts, so leave a comment or question in the comment section below, I answer every single one.
And as always, if you found value in this video, consider subscribing. And do me a favor smash that like button for the youtube algorithm it really does help me out and I’d appreciate it, and ring the bell so you never miss a future video! Alright, thanks for watching!
Watch the Video